

#
UDLinkify Powershell Universal Component Module 🔗


#
Demo Dashboard 💥
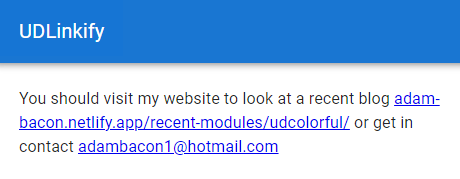
A real quick and easy dashboard to demonstrate the power behind this component. As you can see I have just used plain text to type all the information I need, and this component automatically turns these into correct hyperlinks.
New-UDDashboard -Title 'UDLinkify' -Content {
New-UDRow -Columns {
  New-UDColumn -Content {
    New-UDLinkify -Text "You should visit my website to look at a recent blog adam-bacon.netlify.app/recent-modules/udcolorful/ or get in contact adambacon1@hotmail.com"
  } -LargeSize 4 -MediumSize 4 -SmallSize 4
}
}
#
The Project 🏗️
After having found a few other nice text components that did not already exist to my knowledge for Powershell Universal, I set out to find some more. I came across another simple but yet highly effective and useful React component
#
Using New Site To Find Components 📰
IF YOU READ THE LAST ARTICLE YOU CAN SKIP THIS PARAGRAPH
Yep so even though I am providing the link to the official react component above which is pointing to npmjs.com it seems for some reason when I am searching on npmjs.com I get limited to 20 results no matter what. Like I used to get back thousands of results, and scroll through pages and pages of components till I found the one I was looking for. I even signed up to npmjs thinking maybe you now need to be a member to get back all the results, but I was still only getting 20 results back.
Thankfully the internet has more than just one webpage to find react components, and I then landed on:-
Which was bringing back the number of results I used to get on npmjs and it even gave me the link to the npmjs package page.
Again this might not be the best looking or most fancy component that is out there to use, however it will save you the time of having to remember to use New-UDLink and I can see this being extremely useful for people who just like to type the content and not worry about making sure the hyperlink is a hyperlink.
#
Component JSX File 🗃️
So there are a fair few good files you need to edit in some shape or form to build a component, I think it would be a good idea for me to document this process to show how simple it really is. Before I could edit this JSX file within the components folder I needed to make sure I had installed the npm pacakge for this react component as I saw this needed more than one dependency I used the following website to detect all the dependencies to save me clicking
I then copied this list into notepad then ran this one line to install all these dependencies
gc C:\Builds\dependencies.txt | % {npm i $_ --legacy-peer-deps}So once these were installed, and I had renamed the .PSD1 and .PSM1 file to the module name I wanted. I then edited the .PSD1 file to include the RootModule as the newly named .PSM1 file, I edited the component.build.ps1 file to copy the newly named modules
	Copy-Item $PSScriptRoot\UDLinkify.psd1 $OutputPath
	Copy-Item $PSScriptRoot\UDLinkify.psm1 $OutputPath
also edited line 20 in the webpack.config.js file to be
library: 'udlinkify'Within the components folder there is an index.js file my edited file looked like
import UDLinkify from './component';
UniversalDashboard.register("udlinkify", UDLinkify);
Please keep case-sensitive lower-case for the webpack.config.js file which then reflects what is typed as first arguement within the parenthesis as shown above. Once you have made all these edits to the existing template files, and installed the npm package and all dependencies (in this case I only had two packages to install as only one dependency) it is time to construct the actual component that will be displayed on the dashboard. This is done by editing the component.jsx file witin the components folder within the github template you downloaded. This is my final edited component.jsx file:-
import React from 'react';
import { withComponentFeatures } from 'universal-dashboard'
import Linkify from 'react-linkify';
const UDLinkify = props => {
  return <Linkify key={props.id}> {props.text}</Linkify>;
}

export default withComponentFeatures(UDLinkify)
So VSCode was not complaining about any of the code above, so now I needed to edit the .PSM1 and .PSD1 file to finish this component off before running invoke-build so this is my final PSD1 file below
#
# Module manifest for module 'UDLinkify'
#
# Generated by: psdevuk
#
# Generated on: 13/09/2022
#

@{

# Script module or binary module file associated with this manifest.
RootModule = 'UDLinkify.psm1'

# Version number of this module.
ModuleVersion = '1.0.0'

# Supported PSEditions
# CompatiblePSEditions = @()

# ID used to uniquely identify this module
GUID = '76de2c49-86a9-4b58-9247-edbe35fed09a'

# Author of this module
Author = 'psdevuk'

# Company or vendor of this module
CompanyName = 'Home'

# Copyright statement for this module
Copyright = '(c) adam. All rights reserved.'

# Description of the functionality provided by this module
 Description = 'React component to parse links (urls, emails, etc.) in text into clickable links'

# Minimum version of the PowerShell engine required by this module
# PowerShellVersion = ''

# Name of the PowerShell host required by this module
# PowerShellHostName = ''

# Minimum version of the PowerShell host required by this module
# PowerShellHostVersion = ''

# Minimum version of Microsoft .NET Framework required by this module. This prerequisite is valid for the PowerShell Desktop edition only.
# DotNetFrameworkVersion = ''

# Minimum version of the common language runtime (CLR) required by this module. This prerequisite is valid for the PowerShell Desktop edition only.
# ClrVersion = ''

# Processor architecture (None, X86, Amd64) required by this module
# ProcessorArchitecture = ''

# Modules that must be imported into the global environment prior to importing this module
# RequiredModules = @()

# Assemblies that must be loaded prior to importing this module
# RequiredAssemblies = @()

# Script files (.ps1) that are run in the caller's environment prior to importing this module.
# ScriptsToProcess = @()

# Type files (.ps1xml) to be loaded when importing this module
# TypesToProcess = @()

# Format files (.ps1xml) to be loaded when importing this module
# FormatsToProcess = @()

# Modules to import as nested modules of the module specified in RootModule/ModuleToProcess
# NestedModules = @()

# Functions to export from this module, for best performance, do not use wildcards and do not delete the entry, use an empty array if there are no functions to export.
FunctionsToExport = 'New-UDLinkify'

# Cmdlets to export from this module, for best performance, do not use wildcards and do not delete the entry, use an empty array if there are no cmdlets to export.
CmdletsToExport = '*'

# Variables to export from this module
VariablesToExport = '*'

# Aliases to export from this module, for best performance, do not use wildcards and do not delete the entry, use an empty array if there are no aliases to export.
AliasesToExport = '*'

# DSC resources to export from this module
# DscResourcesToExport = @()

# List of all modules packaged with this module
# ModuleList = @()

# List of all files packaged with this module
# FileList = @()

# Private data to pass to the module specified in RootModule/ModuleToProcess. This may also contain a PSData hashtable with additional module metadata used by PowerShell.
PrivateData = @{

    PSData = @{

        # Tags applied to this module. These help with module discovery in online galleries.
         Tags = @('ud-component','universaldashboard','hyperlink')

        # A URL to the license for this module.
        # LicenseUri = ''

        # A URL to the main website for this project.
         ProjectUri = 'https://github.com/psDevUK/UDLinkify'

        # A URL to an icon representing this module.
         IconUri = 'https://c.tenor.com/tlslhwLM_SEAAAAM/cyber-digital.gif'

        # ReleaseNotes of this module
        # ReleaseNotes = ''

        # Prerelease string of this module
        # Prerelease = ''

        # Flag to indicate whether the module requires explicit user acceptance for install/update/save
        # RequireLicenseAcceptance = $false

        # External dependent modules of this module
        # ExternalModuleDependencies = @()

    } # End of PSData hashtable

} # End of PrivateData hashtable

# HelpInfo URI of this module
# HelpInfoURI = ''

# Default prefix for commands exported from this module. Override the default prefix using Import-Module -Prefix.
# DefaultCommandPrefix = ''

}
To make the actual cmdlet behind this component you need to edit the pre-defined function in the .PSM1 file so this is my finished .PSM1 before running the invoke-build
$IndexJs = Get-ChildItem "$PSScriptRoot\index.*.bundle.js"
$AssetId = [UniversalDashboard.Services.AssetService]::Instance.RegisterAsset($IndexJs.FullName)

function New-UDLinkify {
    <#
    .SYNOPSIS
    React component to parse links (urls, emails, etc.) in text into clickable links

    .DESCRIPTION
    React component to parse links (urls, emails, etc.) in text into clickable links

    .PARAMETER Id
    The ID of this editor

    .PARAMETER Text
    Text for the component

    .EXAMPLE
    New-UDLinkify -Text 'This will auto make links adambacon1@hotmail.com or check https://adam-bacon.netlify.app/'
    #>

    param(
        [Parameter()]
        [string]$Id = (New-Guid).ToString(),
        [Parameter()]
        [string]$Text
    )

    End {
        @{
            assetId = $AssetId
            isPlugin = $true
            type = "udlinkify"
            id = $Id

            text = $Text
        }
    }
}
#
Ready, Steady, Go! 🚦
So once you have followed the above, you are now ready to run:-
invoke-buildAs long as you read the official documentation on building a custom component you would have already downloaded all the prerequisite modules and software required to build custom components. I did find I needed to also install the psake module as well. This process literally took 10 seconds or less. As long as you do not get any errors, and the process completes then within the output directory you will have you brand-new custom component you built.
I restarted the PowershellUniversal service then logged into the main portal. Verified the module was being picked up by the software, by searching the available modules within the program. Once I verified my new module was included, I then did a test on the dashboard.
I now had a fully working react custom component loaded into the Powershell Universal dashboard I had created. I then verified all the parameters worked, which they did then it was time to publish this module to the Powershell Gallery. Please note to include ud-component within the module tags to enable your custom component to be found on the market place exclusive to this product.